

1. Big Build
Tripod
- Start with the tripod legs. Use the spreader to extend the legs to a safe distance. Wider apart increases stability. Increase the length on the legs to increase to the height necessary. On top of the tripod is a bubble to verify level.
- Next, the pan head goes on top of the tripod. On the bottom of a pan head, there is a pin.
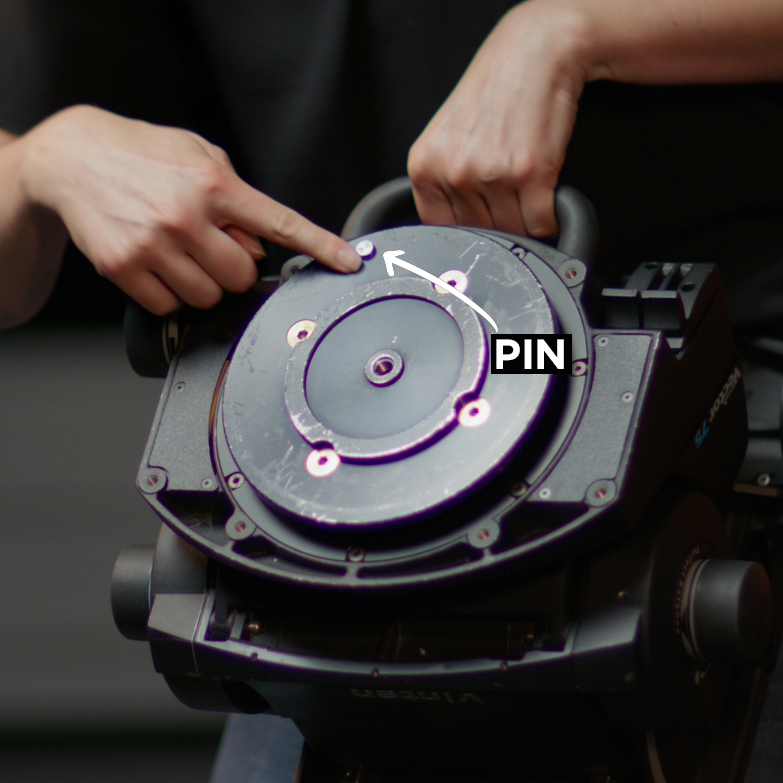 That pin will line up with a notch on the top of the tripod.
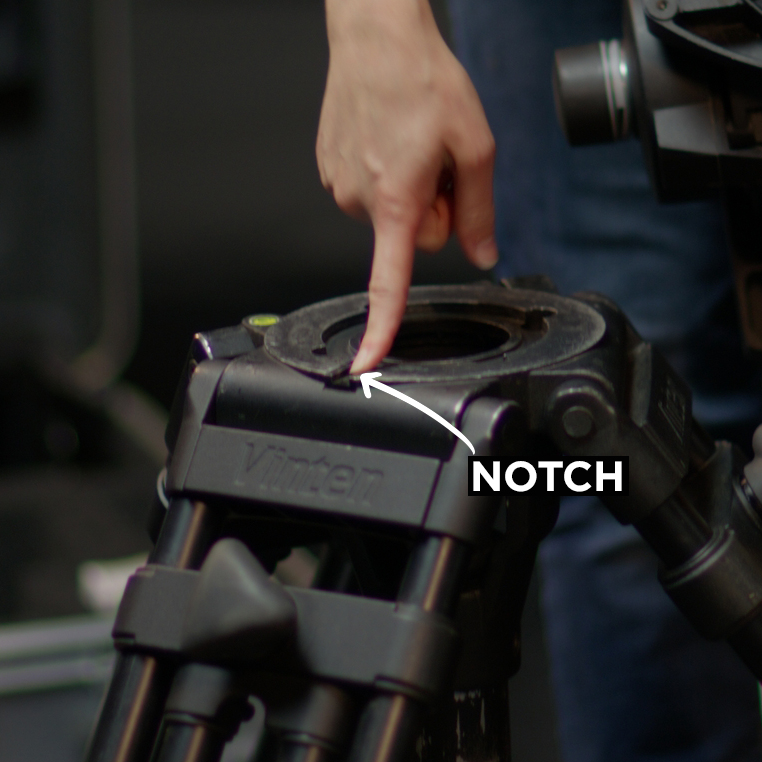 Once lined up, use the screw in between the legs of the tripod to securely attach the head to the legs. Tighten to be just finger tight. Too much tension and it will be very difficult to remove.
Sled and Lens
- Next step is to add the sled. To attach the sled, pull the lever located on the right of the pan head forward and then out. A pin will retract from the surface of the pan head.
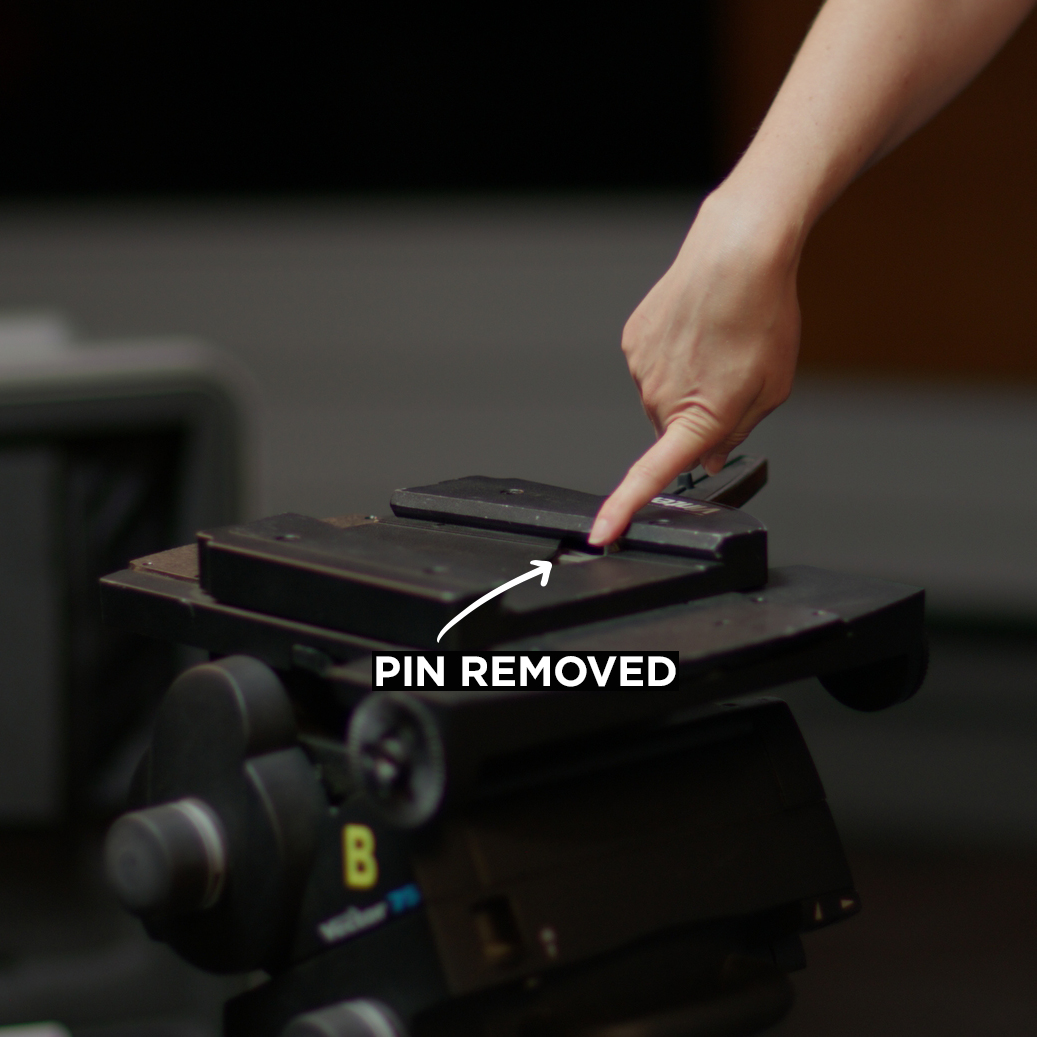 Notice the v-shaped shoe on top of the pan head. Place the sled on top of the tripod and align the V of the pan head to the V on the bottom of the sled. Once aligned and pushed together, lock it in place by pulling the lever out, and then to the left. Once done, give the sled a tug to verify the lock is in the proper place.
- Next is the lens. On top of the sled is a ledge with a notch in the center. When the lens is attached, it will drop down at an angle, with the glass side up in the air, and the mount end pointed down. The notch will receive a pin located on the lens.
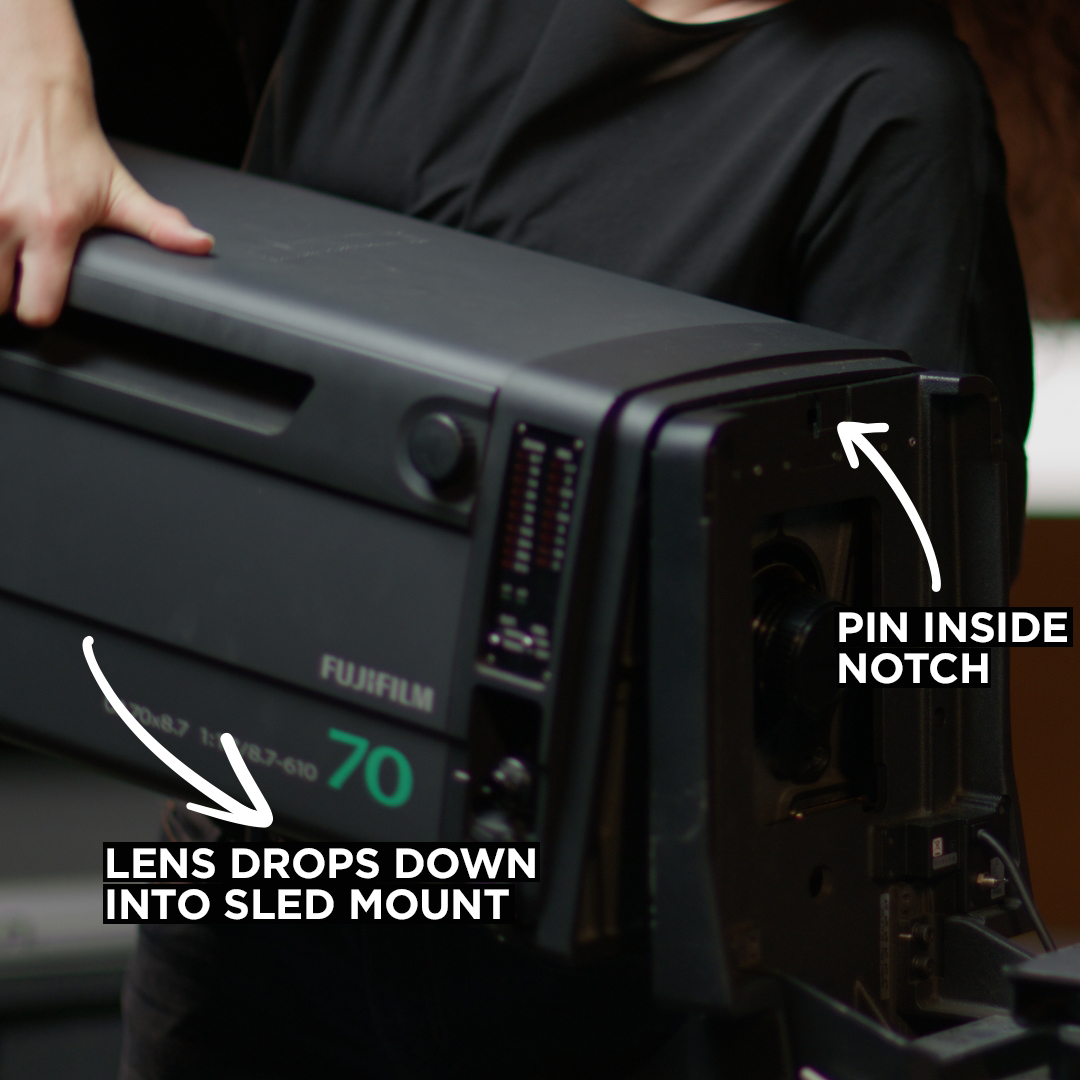 Additionally, there is a set of serial pin connectors on the left side of the sled. These pins must align perfectly to avoid bending the pins or mount. Take time during this process, and use a second person if you are unable to lift 50 lbs above your shoulders. If you are a student worker, ensure a full-time staff member is assisting. Slowly bring the lens down until everything is flush. Once done, lock it in place by turning the little block underneath the lens into an upward position and locking it in finger tight.
Camera Pre-Assembly
-
The next part of a big build is assembled before attaching to the tripod and lens. Starting with the camera body, attach the quick release plate. Like with the sled, the camera body and quick release plate have v-shaped shoe mounts. Align v-shoe to v-shoe and push until it clicks in.
-
Take the viewfinder and align its v-shaped shoe with the corresponding shoe on the top and back of the camera body. Line up the v-shoe’s and click it in.
-
Once done, take your cable for your viewfinder, attach it into the cable clips on the back and wrap the remaining cable around the handle once or twice. Then plug in into the front of the camera body.
-
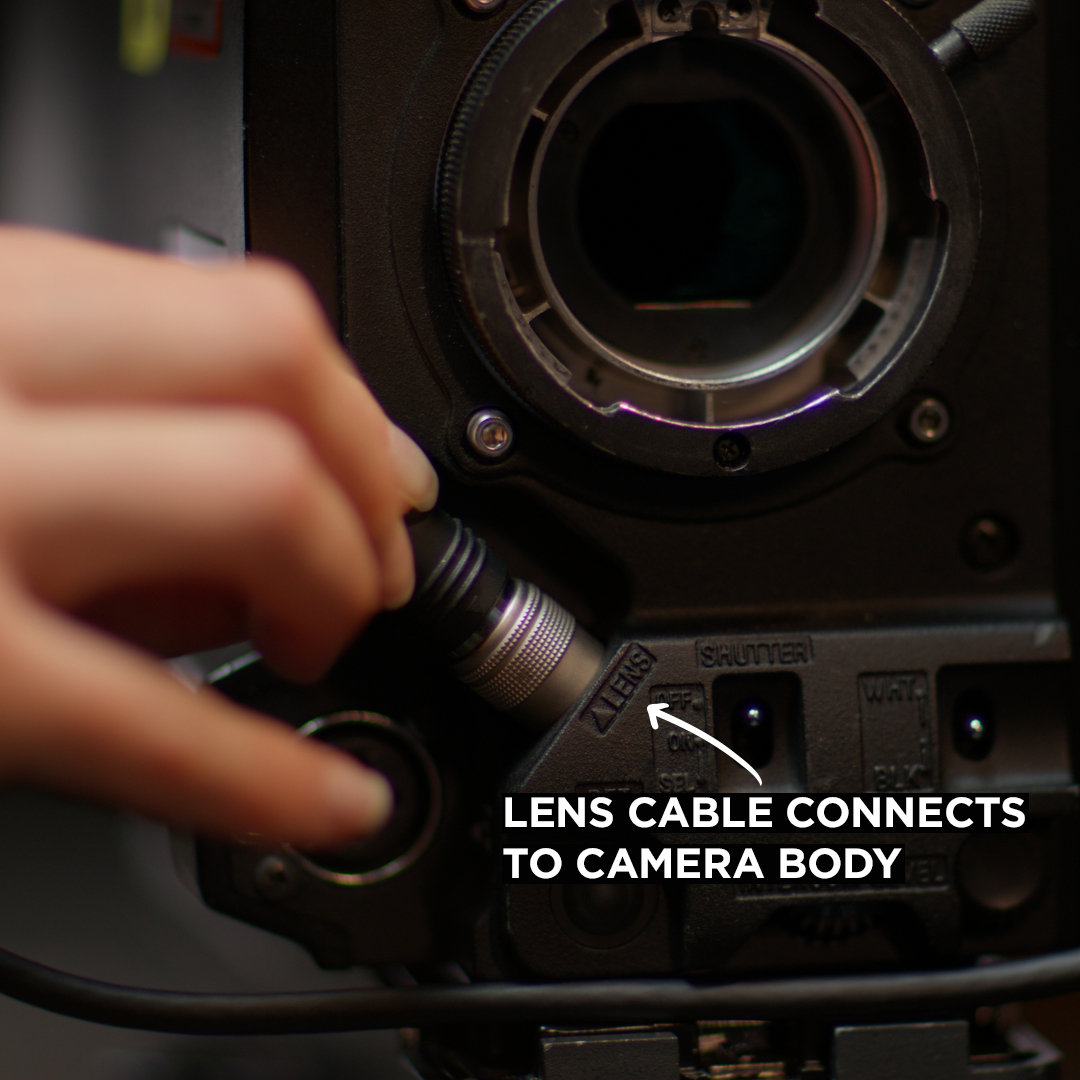
Now, we will attach this to the rest of the camera build. Place the camera body on the sled for support. On the right side of the lens is a short cable. This cable attaches to the front right of the camera body, into a port labeled “lens.”
-
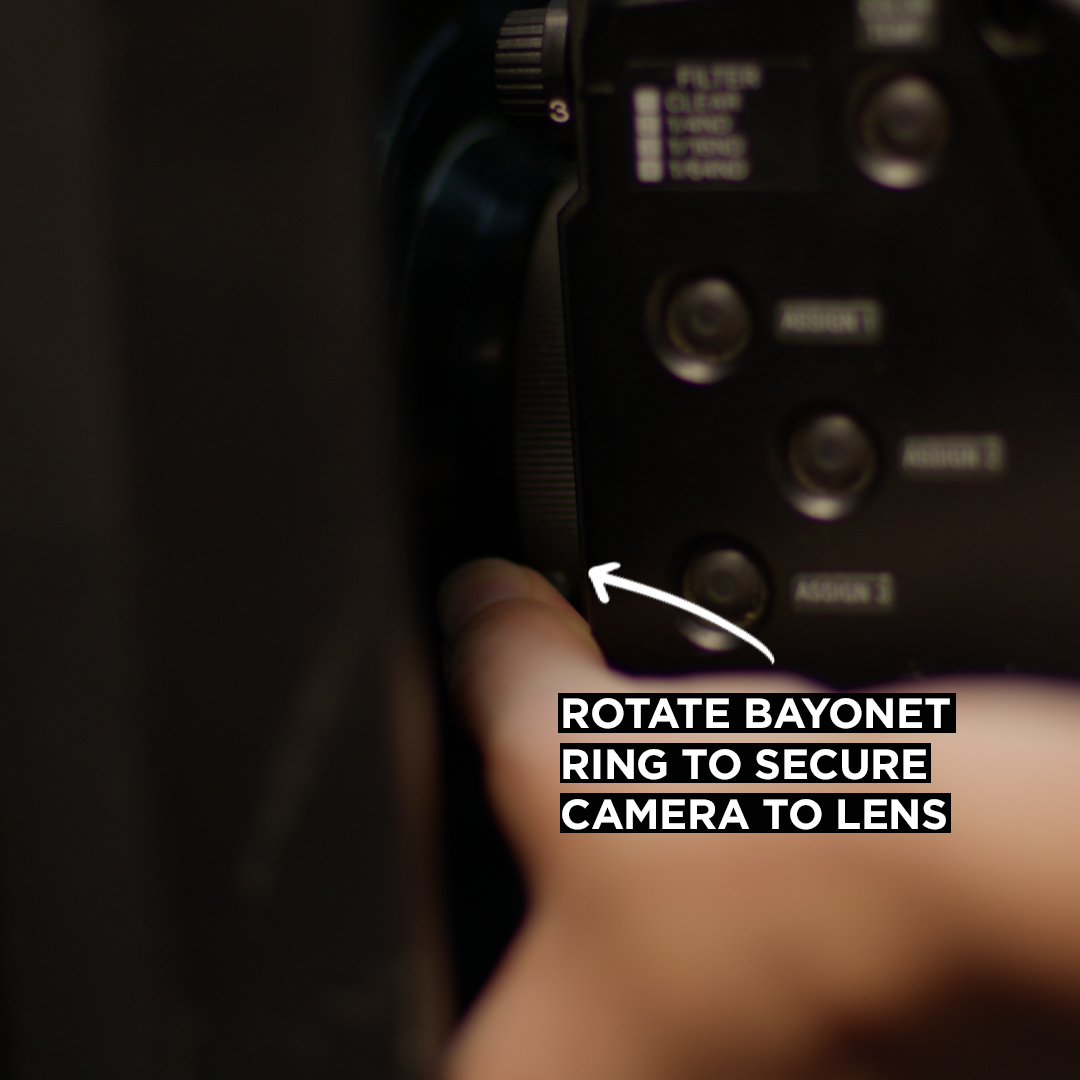
Once done, remove the lens cap and sensor caps. Position the camera onto the lens mount. With your right hand, grab the back of the camera and lift up slightly. With your left hand grab the lens bayonet ring. When the lens mount and camera are perfectly aligned, the ring will be able to smoothly slide down and firmly attach the lens to the camera. The alignment is not always perfect or instantaneous, so use your right hand to carefully move the camera around the mount until it lines up.
-
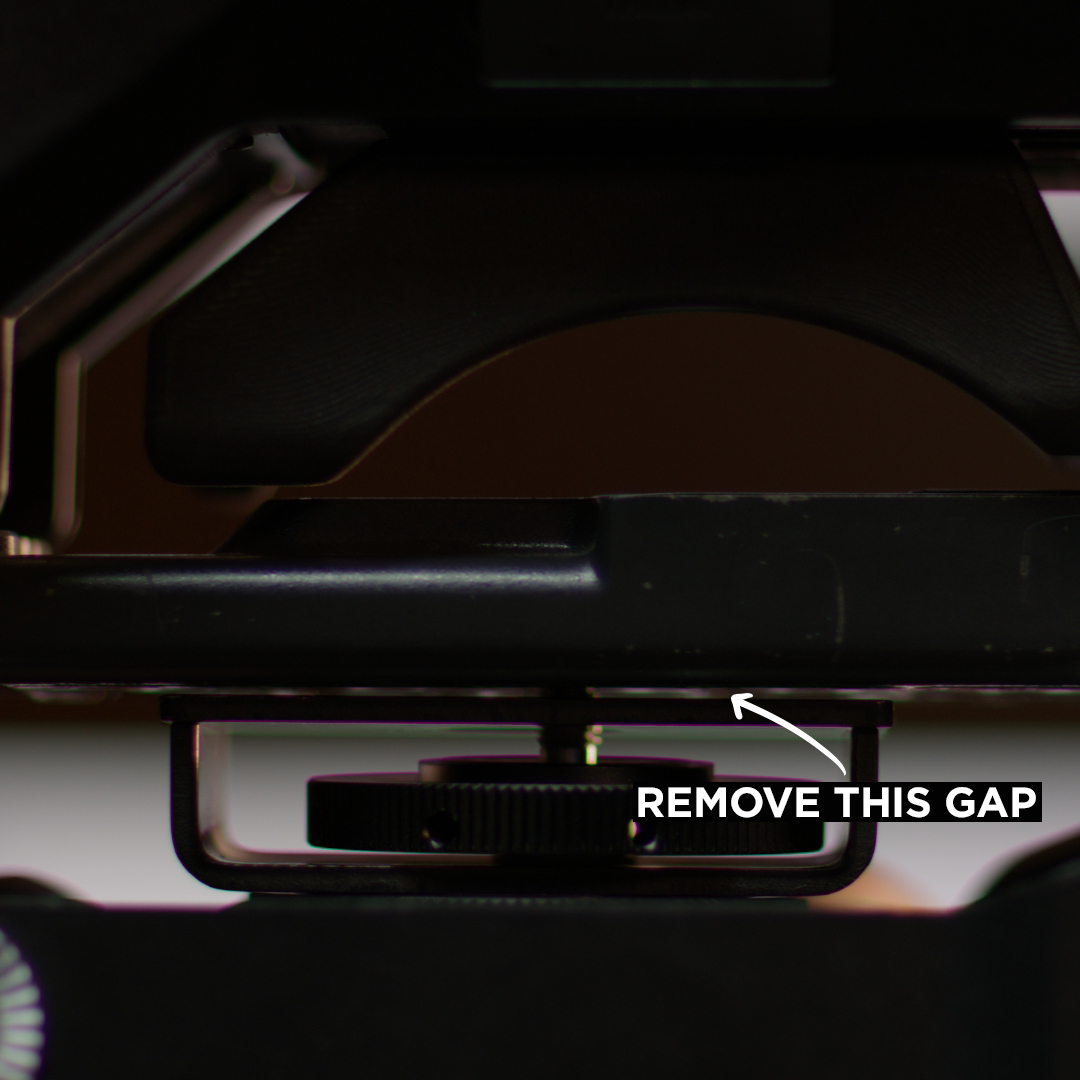
Once attached, there should be a gap below the camera’s plate and the riser on the sled. To remove this gap, rotate the large wheel on the sled with the arrows labeled “down-up.” This will increase or decrease the height on the riser depending on the direction of turn. Rotate it counter-clockwise to increase the height. Do so until there is no gap, then go just a little bit further. The goal is to remove weight and strain on the lens mount.
-
Lastly, the smaller wheel above the riser will securely attach the quick release plate to the sled. Move the wheel around until it lines up with a screw hole and then rotate until it’s finger tight.
Zoom and Focus Arms
-
The final steps are to attach the arms for zoom and focus. The exact position of these arms are completely up to the camera operators and their individual preference. First start by removing the arm bases from the case. Each side of the tripod will receive one arm. Once attached, there will be a smaller, extension arm. This is for the focus. Attach to the left arm.
-
Next, the focus clamp. Verify that the clap sits on the arm in the proper way. When compressed together, there should be a diamond showing up in the center.
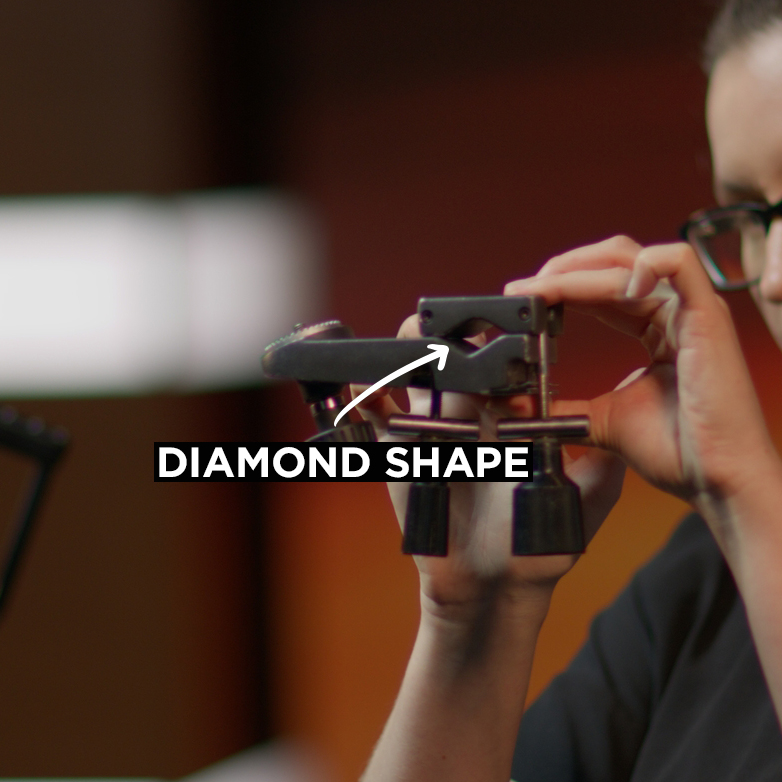 If not, it must flip around. Secondly, there are tabs are on the bottom of the clamp. When the silver bar sits in the clamp, the tabs should be at the bottom of it.
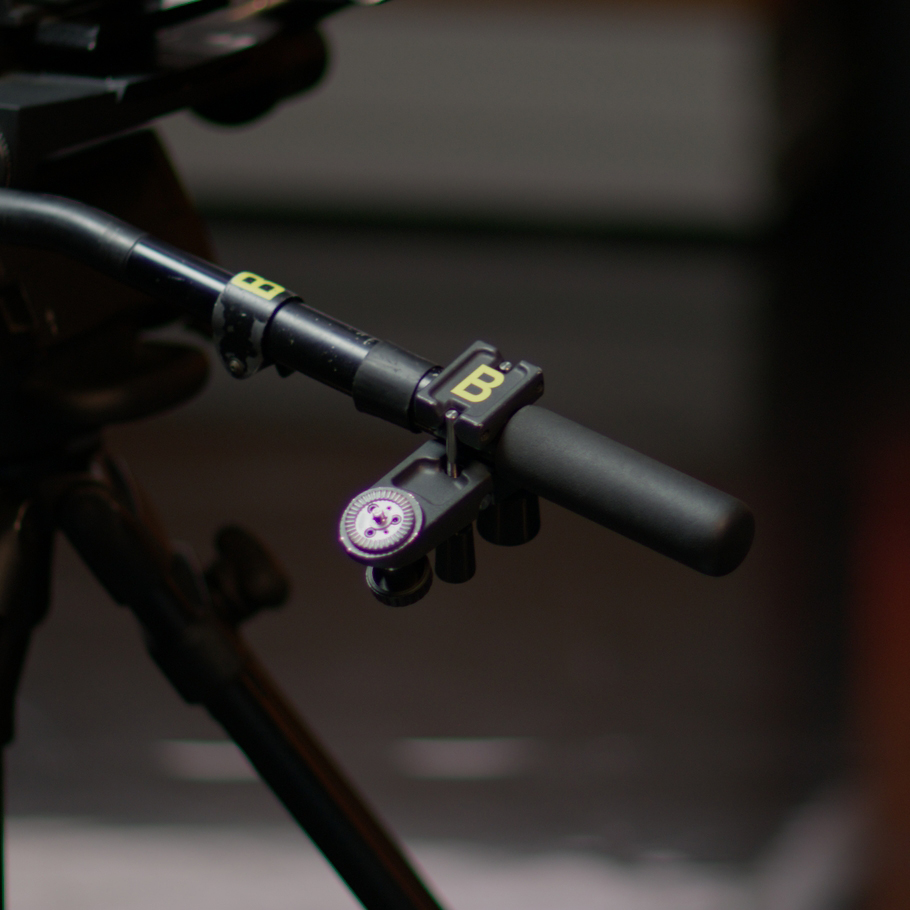
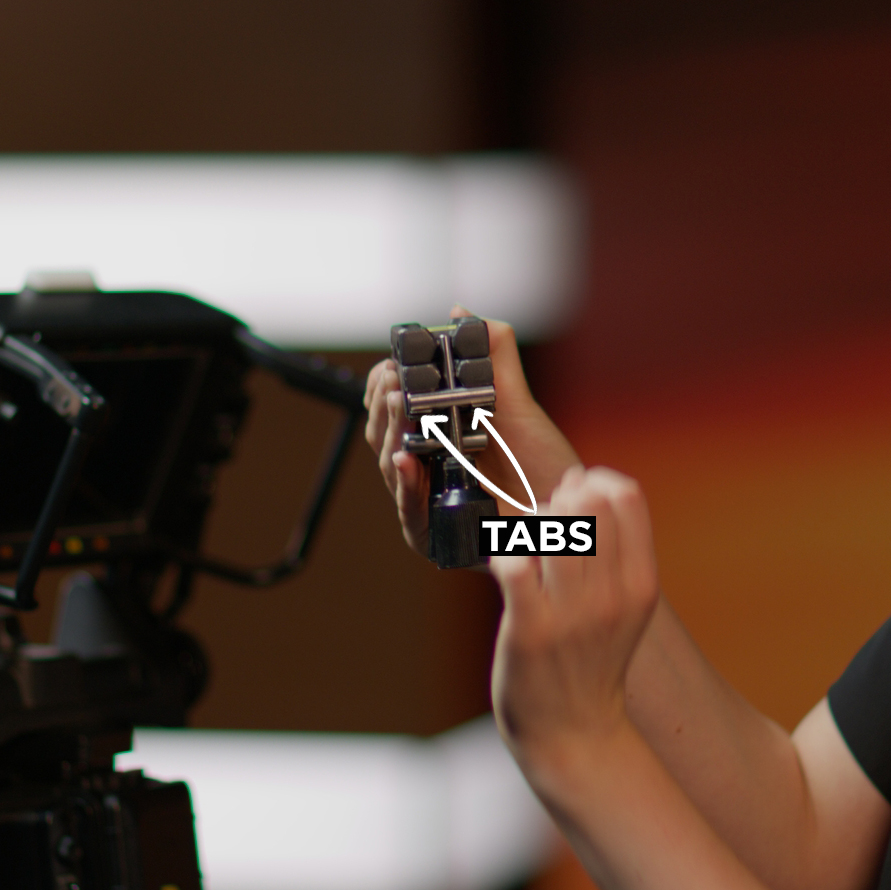 If not, the bar will not sit properly and may fall out. Wrap the clamp around the focus arm and use the knobs to tighten it. Tighten each side evenly, do not tighten one side more than the other, even if it is secure. Over time the screws will bend and become unusable. Finally, take the focus knob from the case and attach it to the focus clamp finger tight.
-
On the right side, attach the zoom controller found in the case. The arm comes with many different rotating elements that can be tailored to the operator’s preference. To connect zoom and focus to the lens, there is a special cable.
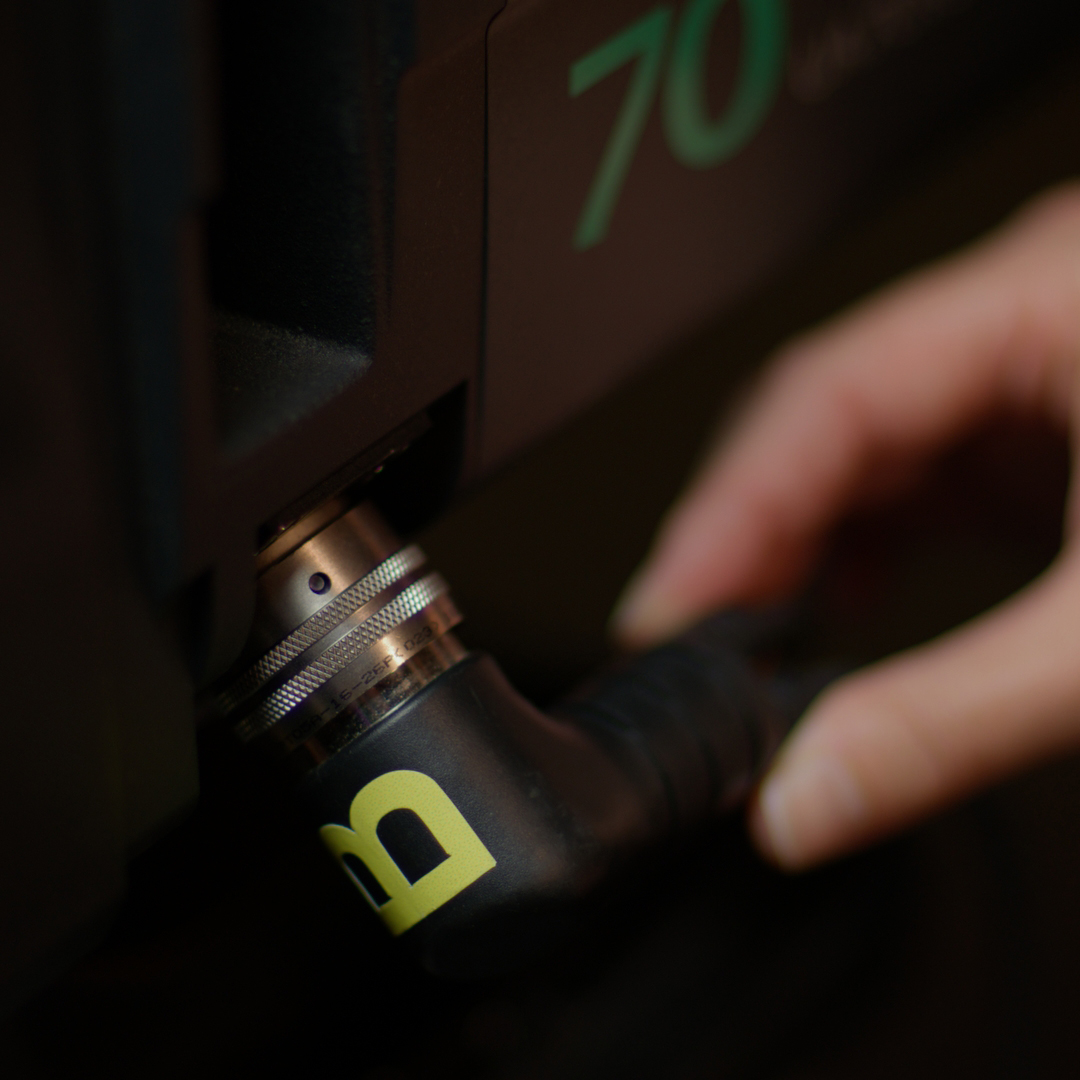 The larger end will connect to the right-side of the lens and points away. The attachment is similar to a BNC connector, it will only align one way.
 -
Once attached, take the zoom cable and attach it to the controller.
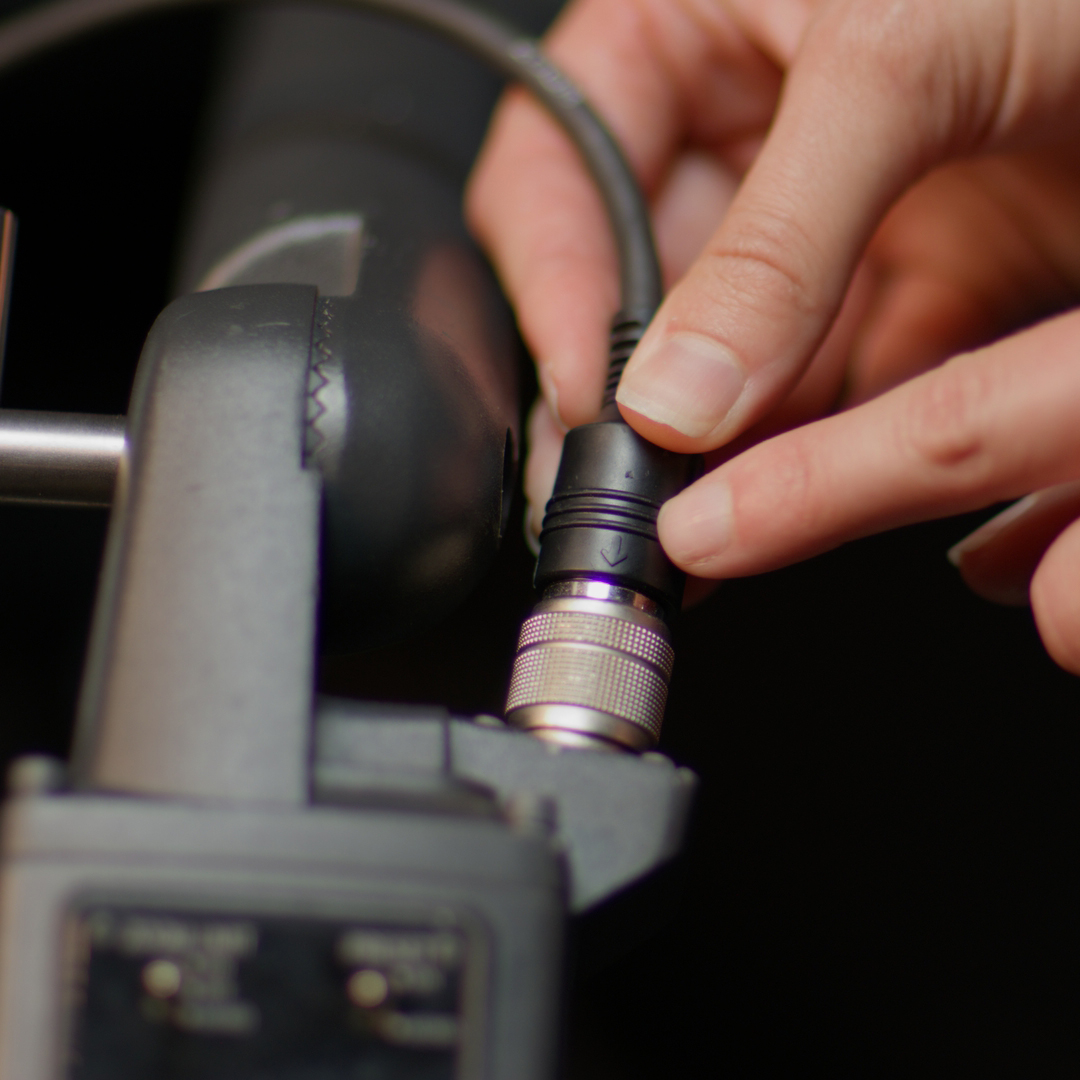 Wrap it once or twice around the arm to remove slack and keep it from catching on the tripod head. Then, take the focus under the lens to the left side. Again, wrap it around like once just to keep things from hanging. Similarly, this connector is in kind to a BNC connection, it will only attach one way. Once aligned, twist the outside ring to lock it into place.
Optical-con
- Attach the optical con cable to the camera. Before doing so, verify all cable connections on the camera are secure by a gentle tug. Connect the Optical-con cable and put the caps into each other. You have now built a big build camera.